

Want to make your home movie nights feel a bit more special, like you’re actually in a cinema? One simple trick that can really elevate the experience without a huge investment is adding some backlight behind your TV or screen. It’s not just about making things look fancy; it genuinely helps create a more comfortable and immersive atmosphere.
Why Bother with Backlight?
Setting up a home cinema, even a small one, is about more than just having a big screen. It’s about drawing yourself into the movie, shutting out the distractions of the room, and letting the story take centre stage. Think about when you’re watching TV in a completely dark room. Your eyes have to work harder to adjust between the bright screen and the surrounding darkness, which can lead to eye strain.
- Reduces Eye Strain: This is probably the most practical benefit. When the screen is the only light source in a dark room, your pupils constantly dilate and constrict as they try to focus on the varying brightness levels. Backlight provides a consistent, low-level illumination around the screen, which eases this constant adjustment. It’s like giving your eyes a gentle resting point.
- Enhances Perceived Contrast: It might seem counterintuitive, but a subtle backlight can actually make the picture on your screen appear to have better contrast. By providing a soft glow, it creates a boundary between the bright screen and the darker room. This makes the darks on your screen look darker and the brights pop more without making the overall image jarring.
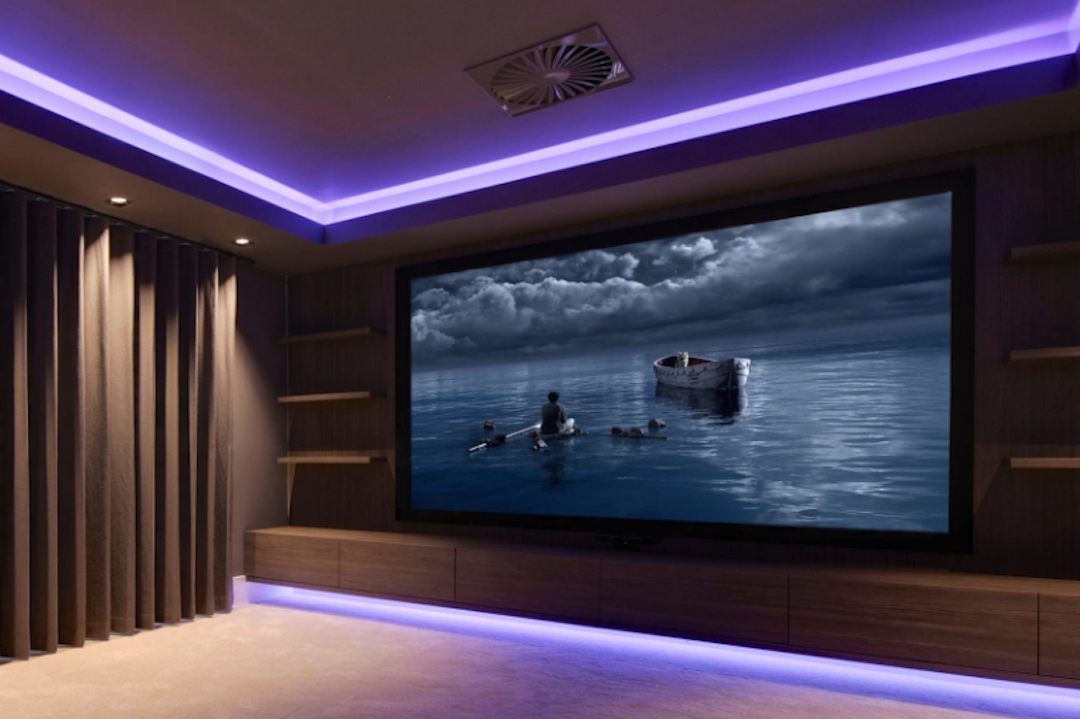
- Creates Immersion: When you’re watching something, especially in cinema, there’s a sense of being enveloped by the experience. Backlight helps achieve this by extending the visual field beyond the immediate confines of the screen. It softens the edges of the television and makes the picture feel more integrated into your viewing space, pulling you in a bit deeper.
- Sets the Mood: Let’s be honest, it just looks good. A well-placed backlight can add a touch of sophistication to your setup and make your viewing area feel more premium. It’s a subtle detail that can make a big difference in how you feel when you’re using the space.
Types of Backlighting Solutions
There are a few different ways you can go about adding backlight Jievik to your setup. The best option for you will depend on your budget, how much effort you want to put in, and the look you’re going for.
LED Strips: The Most Common Choice
LED strips are overwhelmingly the most popular choice for TV backlighting, and for good reason. They’re versatile, affordable, and relatively easy to install.
- Basic LED Strips: These are the simplest kind. You usually get a roll of LEDs with an adhesive backing. You simply stick them to the back of your TV, plug them into a power source, and they emit a single colour of light. Some might have a simple remote to turn them on and off or change brightness.
- RGB (Red, Green, Blue) LED Strips: This is where things get more fun. These strips allow you to mix red, green, and blue light to create a wide spectrum of colours. This means you can pick a colour that complements the mood of your movie, or even just your personal preference. Most RGB strips come with a remote control for colour selection and brightness adjustments.
- Addressable RGB (ARGB) or WS2812B LED Strips: This is the next level up, and it’s what allows for dynamic and synchronized lighting effects. Each LED on these strips can be controlled individually. This means you can have gradients of colour moving across the strip, or even have the lights react to what’s happening on your screen. This is the closest you’ll get to that immersive cinema-style lighting at home.
Installation: Getting It Right
The way you install your backlight can significantly impact the final effect. It’s not just about sticking them on; a little thought goes a long way.
Placement is Key
Where you position the LED strips behind your TV is crucial for achieving the best diffusion and avoiding harsh lines of light.
- Edging the Perimeter: The most common and effective placement is to run the LED strips along the edges of the back of your TV. This creates a halo effect surrounding the screen. Aim to keep the strips relatively close to the outer edge, but not so close that the individual LEDs are easily visible.
- Avoiding Direct Line of Sight: You don’t want to see the individual light sources directly. The goal is to bounce the light off the wall behind the TV, creating a soft, diffused glow. If you can see the individual LEDs, they might be too close to the edge or not angled correctly.
- Corner Folds: When you reach a corner with an LED strip, you’ll need to either bend the strip if it’s flexible, or use a small connector cable to bridge the gap and continue the strip on the next side. Gentleness is key here to avoid damaging the LEDs.
Powering Your Lights
You’ll need to consider how you’re going to power your LED strips.
- USB Power: Many shorter LED strips can be powered directly from a USB port on your TV or a nearby USB power adapter. This is a very convenient option as it often means the lights will turn on and off automatically with your TV.
- Wall Adapters: Longer or more powerful LED strips will typically come with their own AC to DC power adapter that plugs into a wall outlet. Make sure to choose a power adapter that provides the correct voltage and sufficient amperage for your chosen LED strip.
Advanced Setups: Syncing with Your Content
For the truly immersive experience, you’ll want your backlight to react to what’s on the screen. This is where more advanced setups come into play.
HDMI Sync Boxes
These devices are designed to capture the video signal going into your TV and use that information to control your LED lights.
- How They Work: An HDMI sync box sits between your source device (like a streaming stick, Blu-ray player, or game console) and your TV. It interrupts the HDMI signal, analyzes the colours and brightness on the edges of the screen, and then sends commands to your compatible LED lighting system to match.
- Compatibility is Crucial: Not all LED strips are compatible with all HDMI sync boxes. You’ll likely need specific addressable RGB LEDs and a sync box designed to work with them. Brands like Philips Hue and Govee offer integrated systems that simplify this.
- Potential for Lag: While most modern sync boxes are very good, there can be a slight, almost imperceptible, delay between what you see on screen and the lighting reacting. For most casual viewing, this isn’t an issue, but competitive gamers might notice it.
Software-Based Solutions
If you’re using a computer or a smart TV with certain capabilities, you might be able to use software to control your lights.
- PC-Based Control: If your TV viewing primarily happens through a computer connected to your TV, there are numerous software programs (like Hyperion, Prismatik) that can analyze the screen output and control addressable LED strips via a separate controller (like an Arduino). This is a more DIY-friendly but potentially complex route.
- Smart TV Apps: Some smart TV platforms or associated devices might offer apps that allow for a degree of screen mirroring or ambient lighting control. This is less common for highly synchronized lighting but can offer simpler ambient effects.
Beyond the TV: Other Backlighting Ideas
Don’t feel limited to just the back of your television. You can extend this ambient lighting concept to other parts of your viewing area to further enhance the atmosphere.
Ambient Lighting for the Room
Creating a cohesive ambient lighting scheme can significantly boost the cinema feel.
- Wall Washers: Consider placing lights behind your couch or along the walls to create a general, soft glow. This can provide a comfortable overall illumination without drawing attention away from the screen.
- Accent Lighting: Subtle accent lighting on shelves or behind decorative items can add depth and visual interest to your room after the movie is over.
- Smart Lighting Systems: If you’re investing in a more sophisticated system, explore smart bulbs or light bars that can be programmed to create specific moods or scenes. Many systems can be controlled via voice assistants or apps, adding convenience.
Sound-Reactive Lighting
While screen synchronization is a primary goal for many, sound-reactive lighting can also add a dynamic element.
- Built-in Microphones: Many LED strips or standalone lighting devices have built-in microphones that pick up ambient sound and react with light pulses or changes.
- Music Visualization: This is particularly effective for music playback but can add energy during action sequences in movies. The lights will flash, change colour, and move in time with the audio cues.
- Less Precise than HDMI Sync: It’s important to note that sound-reactive lighting is less precise than HDMI synchronization. It’s reacting to sound, not directly to the visual content, so it might not perfectly match on-screen actions.
Maintaining Your Atmospehre
Once you’ve set up your backlight, a little ongoing attention will keep it performing well and looking its best.
Cleaning and Care
Dust and fingerprints can diminish the light output and affect the appearance.
- Gentle Cleaning: Use a soft, dry microfiber cloth to gently wipe down the LED strips and any diffusers. Avoid using harsh chemicals or abrasive materials, as these can damage the LEDs or the backing.
- Check Connections: Periodically check that all power connections and cable runs are secure. Loose connections can lead to flickering lights or complete outages.
Adjusting and Experimenting
The beauty of ambient lighting is its flexibility. Don’t be afraid to tweak things.
- Brightness Levels: Find a brightness level that’s comfortable for your eyes. Too bright, and it can be distracting; too dim, and it won’t have the desired effect.
- Colour Preferences: Experiment with different colours. A cool blue can enhance the feel of a sci-fi film, while a warm orange might suit a drama. Or, if you have addressable LEDs, try subtle gradients.
- Seasonal or Event-Based Lighting: You can even change your lighting scheme for holidays or special events. Think festive reds and greens for Christmas, or spooky purples and oranges for Halloween.
Creating a private cinema atmosphere with backlight is a progressive project. You can start with simple LED strips and gradually upgrade to more sophisticated, synchronized systems as your interest and budget allow. The key is to experiment and find what works best for your space and your personal viewing experience.
